Imagine turning your backyard pool from a simple soaking spot into a powerful fitness and recreation center—without expanding a single square foot. Swim jets, also known as pool jets, have become one of the most sought-after upgrades for homeowners who want endless swimming potential in a compact space. Whether you’re training for a triathlon or simply want your family to enjoy a more engaging pool experience, these systems deliver a continuous current that lets you swim in place indefinitely.
But with any electrical equipment near water, safety concerns naturally arise. This guide focuses on the critical safety features you should understand—including GFCI protection and low-voltage pool current—alongside practical, easy installation steps that make this upgrade accessible rather than intimidating. Modern swim jets function as a fully waterproof swimming system, engineered to keep electrical components sealed and swimmers protected. In the sections ahead, you’ll find everything you need to confidently plan, install, and maintain a swim jet that transforms how you use your pool.
What is a Swim Jet and Why Upgrade Your Pool?
A swim jet is a device that generates a powerful, adjustable stream of water in your pool, creating a continuous current you can swim against without ever reaching the wall. Think of it as a treadmill for swimmers—you stay in one place while the water flows past you, simulating open-water conditions in a fraction of the space. These systems are sometimes referred to as pool jets, swim current generators, or resistance swimming systems, and they come in various configurations from wall-mounted units to standalone portable designs.
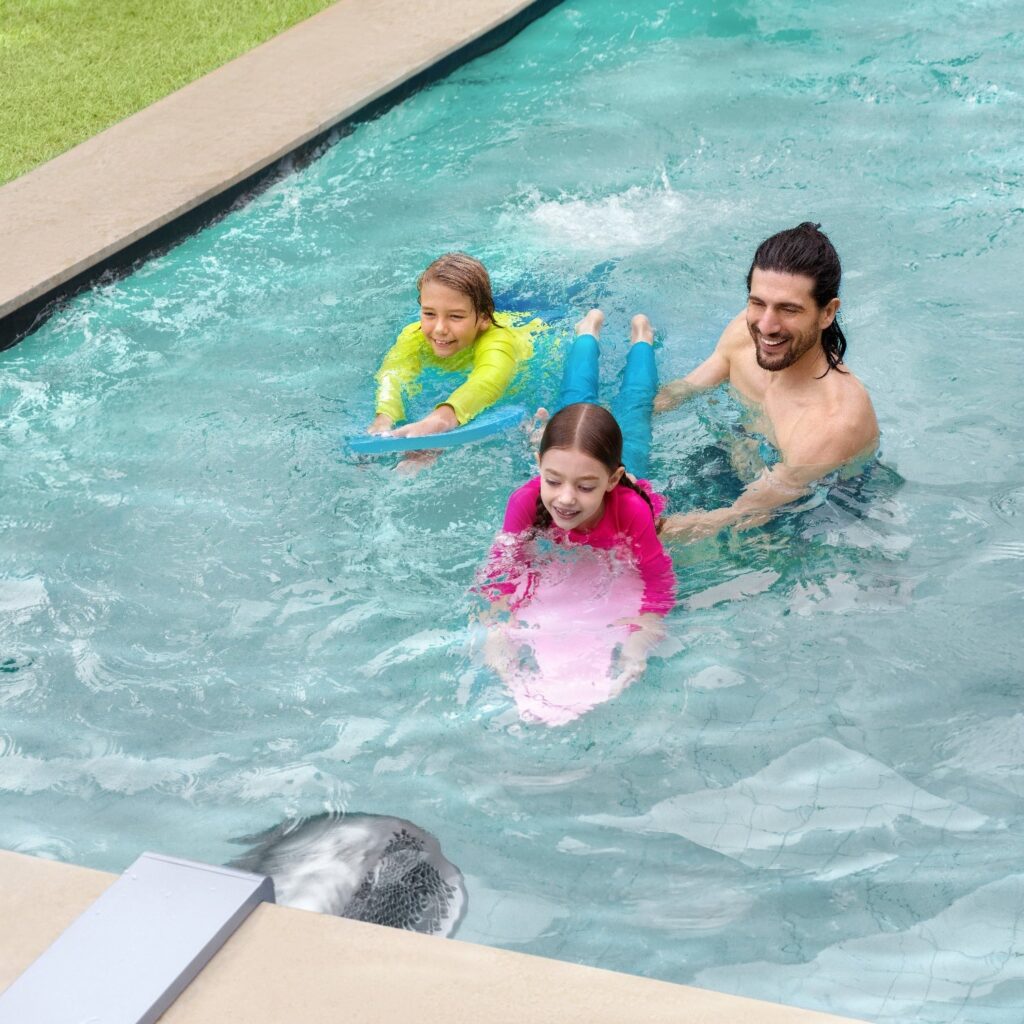
The appeal of adding a swim jet to your pool goes far beyond novelty. For fitness enthusiasts, it transforms even a modest-sized pool into a legitimate training environment where you can practice strokes, build endurance, and complete structured workouts without the repetitive flip turns of traditional lap swimming. Families discover that children love playing in the current, and adults appreciate the therapeutic benefits of swimming against gentle resistance for low-impact exercise. Modern units function as a fully waterproof swimming system, meaning all electrical and mechanical components are engineered with sealed housings that prevent water intrusion and ensure reliable long-term performance. This upgrade directly addresses what many homeowners want most: getting more value and enjoyment from the pool they already have, without costly renovations or additional square footage. Whether your goal is cardiovascular training, rehabilitation, or pure recreation, a swim jet adapts to serve every member of the household.
See also: Common Signs of Foundation Damage in Homes
Safety First: Essential Swim Jet Safety Features Explained
When you’re combining electricity and water, there’s no room for shortcuts. Pool-related electrical accidents, while rare with properly installed equipment, can be devastating—which is why understanding the safety architecture built into modern swim jets is essential before you purchase or install one. The good news is that today’s systems are engineered with multiple layers of protection that work together to eliminate hazards, but you need to know what to look for and why each component matters.
Every swim jet worth considering incorporates three fundamental safety pillars: ground fault circuit interruption, waterproof component enclosures, and low-voltage electrical design. These aren’t optional extras or premium add-ons—they’re baseline requirements that reputable manufacturers build into their systems from the ground up. When evaluating different models, verify that each of these protections is explicitly documented in the product specifications rather than assumed. Additionally, look for certifications from recognized testing laboratories, which confirm that independent engineers have validated the safety claims. Understanding how these features function individually and as an integrated system gives you the knowledge to make informed decisions during both the purchasing and installation phases, ensuring your family enjoys the swim jet experience without unnecessary risk.
Understanding GFCI Protection for Swim Jets
A GFCI, or Ground Fault Circuit Interrupter, continuously monitors the electrical current flowing through a circuit. If it detects even a tiny imbalance—as small as 4 to 5 milliamps, which indicates current is leaking through an unintended path like water or a human body—it shuts off power within milliseconds. This reaction time is fast enough to prevent electrocution. For swim jets, GFCI protection is typically integrated at the breaker panel and sometimes duplicated at the outlet level, creating redundant safeguards. During installation of swim jet systems, the GFCI must be properly rated for the unit’s amperage and tested monthly using the built-in test button to confirm it trips correctly. This single component is arguably the most critical electrical safety device protecting swimmers.
The Role of Waterproof Systems and Low-Voltage Pool Current
Modern swim jets operate as a fully waterproof swimming system by encasing all electrical connections, motors, and control boards within sealed housings rated to IP68 or equivalent standards. These enclosures prevent water from ever contacting live components, even under continuous submersion and pressure. Gaskets, marine-grade sealants, and corrosion-resistant materials ensure these barriers hold up over years of use. Complementing this physical protection, many systems utilize low-voltage pool current—typically 12 to 24 volts—for any components that interact directly with pool water. At these voltage levels, even in a worst-case seal failure scenario, the electrical potential is insufficient to cause harmful shock to swimmers. Together, waterproof construction and low-voltage design create a defense-in-depth strategy that protects your family through multiple independent safety mechanisms.
Easy Swim Jet Installation: A Step-by-Step Guide
One of the biggest misconceptions about swim jets is that installation requires tearing apart your pool or hiring a team of specialists for weeks of work. While professional installation is always an option—and recommended for complex setups—many modern swim jet systems are designed with homeowner-friendly installation in mind. Manufacturers have recognized that accessibility matters, and today’s units often feature modular designs, clear wiring diagrams, and pre-assembled components that dramatically reduce complexity. The installation of swim jet systems typically falls into two categories: permanent wall-mounted units that require some plumbing and electrical work, and portable or hanging systems that can be set up with minimal modifications to your existing pool structure. Regardless of which type you choose, the process follows a logical sequence from planning through testing that ensures both proper function and complete safety compliance. The key is approaching each phase methodically rather than rushing to get water flowing.
Planning and Pre-Installation Preparation
Before any physical work begins, assess your pool’s compatibility with your chosen swim jet model. Measure your pool dimensions carefully—most manufacturers specify minimum length and depth requirements to ensure the current has adequate space to develop properly without creating turbulence against walls. Examine your pool’s construction material, whether concrete, fiberglass, or vinyl liner, as this determines mounting options and hardware requirements. Next, evaluate your electrical infrastructure. Check your breaker panel for available capacity, noting that most swim jets require a dedicated circuit with appropriate amperage. Identify the distance from the panel to your planned installation point, as longer runs may require heavier gauge wiring. For the installation of swim jet systems, gather essential tools including a drill with masonry or appropriate bits, conduit and weatherproof junction boxes, marine-grade silicone sealant, a multimeter for electrical testing, and appropriate personal protective equipment such as insulated gloves and safety glasses. Select your mounting location based on the longest unobstructed swimming path in your pool—typically centered on a short wall—and confirm that the power source can reach this location within code-compliant routing distances.
Detailed Installation Process and Testing
Begin by marking your mounting points precisely using the manufacturer’s template, ensuring the jet nozzles will sit at the correct depth below the waterline—typically between 12 and 18 inches for optimal current delivery. Drill pilot holes and install mounting brackets using hardware rated for wet environments, such as stainless steel or marine-grade fasteners. For wall-penetrating installations, apply waterproof sealant generously around any through-hull fittings before tightening, then allow full cure time as specified by the sealant manufacturer. When connecting electrical components, run dedicated wiring from your breaker panel through weatherproof conduit to the unit’s junction point. Install the GFCI breaker at the panel first, ensuring it matches the system’s voltage and amperage specifications. Connect wiring according to the color-coded diagram provided, securing all connections within waterproof enclosures and verifying that low-voltage transformers are positioned above the flood line in a ventilated, accessible location. Double-check that all ground wires are properly bonded to your pool’s existing bonding grid, which is critical for electrical safety. Once all connections are secure and sealed, fill the pool to operating level if it was lowered during installation. Power on the system at the breaker and immediately test the GFCI by pressing its test button—it should trip instantly. Reset it, then activate the swim jet at its lowest setting. Verify water flow direction, check for any leaks around fittings, and use a multimeter to confirm zero voltage is present in the pool water. Gradually increase current strength while observing for vibration, unusual noise, or seal weeping. Document your final settings and keep all installation records for future maintenance reference.
Maintenance and Troubleshooting for Your Swim Jet System
Once your swim jet is installed and running smoothly, consistent maintenance keeps it performing safely for years. Neglecting routine care doesn’t just reduce efficiency—it can compromise the waterproof seals and electrical protections that keep your family safe. The good news is that most maintenance tasks are straightforward and take only minutes when performed on a regular schedule. Homeowners who manage their pools through smart home platforms like iGarden can often set automated reminders for maintenance intervals, making it easier to stay on top of routine inspections.
Every two weeks, inspect the jet nozzles and intake grates for debris accumulation. Leaves, hair, and calcium deposits restrict water flow and force the motor to work harder, which generates excess heat and accelerates wear on internal seals. Clean intake screens with a soft brush and use a diluted vinegar solution to dissolve mineral buildup on nozzle surfaces. Monthly, examine all visible gaskets and sealant joints around mounting points for signs of cracking, discoloration, or weeping moisture. Even minor seal degradation should be addressed immediately—replace gaskets with manufacturer-specified parts and reapply marine-grade sealant where needed. Test your GFCI breaker monthly by pressing the test button and confirming it trips, then reset it. Twice per year, have a qualified electrician verify the bonding grid connections and measure for any stray voltage in the pool water using a sensitive millivolt meter.
When troubleshooting common issues, reduced current strength often indicates a clogged impeller or partially blocked intake rather than a motor problem—remove the intake cover and clear any obstructions before assuming mechanical failure. If the system trips the GFCI repeatedly, this signals a ground fault that demands immediate attention; do not bypass the breaker or attempt to reset it continuously. Instead, power down the system completely, inspect all junction boxes for moisture intrusion, and check wiring connections for corrosion. Unusual vibration or grinding sounds typically point to worn bearings or a foreign object contacting the impeller. For any electrical fault, persistent leak, or issue beyond basic cleaning and visual inspection, contact a licensed pool electrician or the manufacturer’s service team rather than attempting repairs that could void warranties or create hazards.
Transform Your Pool with Confidence: Safety, Installation, and Long-Term Care
Adding a swim jet to your pool is one of the most impactful upgrades you can make—transforming a static body of water into a versatile fitness, therapy, and recreation hub without expanding your pool’s footprint. The key takeaway from this guide is that safety and accessibility go hand in hand with modern swim jet systems. GFCI protection acts as your first line of defense against electrical hazards, cutting power in milliseconds if anything goes wrong. Waterproof enclosures and low-voltage pool current provide additional layers of protection that work independently, so even if one barrier is compromised, others remain in place to keep swimmers safe.
Installation no longer needs to be a daunting prospect. With proper planning, the right tools, and a methodical approach to mounting, wiring, and testing, many homeowners can complete the process themselves or work confidently alongside a professional installer. Regular maintenance—simple tasks like cleaning intakes, inspecting seals, and testing your GFCI monthly—ensures that safety performance never degrades over time. Whether your motivation is serious athletic training or giving your family a more exciting way to enjoy the backyard, a swim jet delivers on that promise. With the knowledge you now have about how these systems protect and perform, you can move forward with confidence, knowing your pool upgrade is as safe as it is transformative.